Complete Installation Guide for OpenClaw
If you want an AI assistant that can help automate tasks and connect various tools, OpenClaw (affectionately known as “Little Lobster”) is a great choice.
Many beginners find installation daunting due to code, permissions, and environmental errors. Don’t worry; this article compiles the latest official installation guidelines, covering three scenarios: computer, mobile, and cloud server, explained in simple terms.
Preparation Before Installation (3 Minutes)
Before getting started, confirm that your device meets the basic requirements to avoid 90% of installation failures.
1. Computer (Windows/Mac/Linux)
- System: Windows 10 or above (64-bit), macOS 12 or above, or mainstream Linux systems.
- Memory: Minimum 2GB, recommended 4GB or more (8GB+ if running large models locally).
- Disk Space: At least 500MB free.
- Network: A stable internet connection is required to download dependencies (local models can be used offline after installation).
- Important Reminder: The installation path should not contain Chinese characters, spaces, or special symbols (e.g., do not place it in “My Documents”).
2. Mobile (Android/iOS)
- Android: System recommended Android 10 or above, memory 4GB or more, with 5GB storage reserved.
- iOS: Direct installation of the app is not supported; use the “cloud version” or access remotely via a computer.
- Security: Download only from official or reputable app stores, avoid clicking unknown links to prevent privacy leaks.
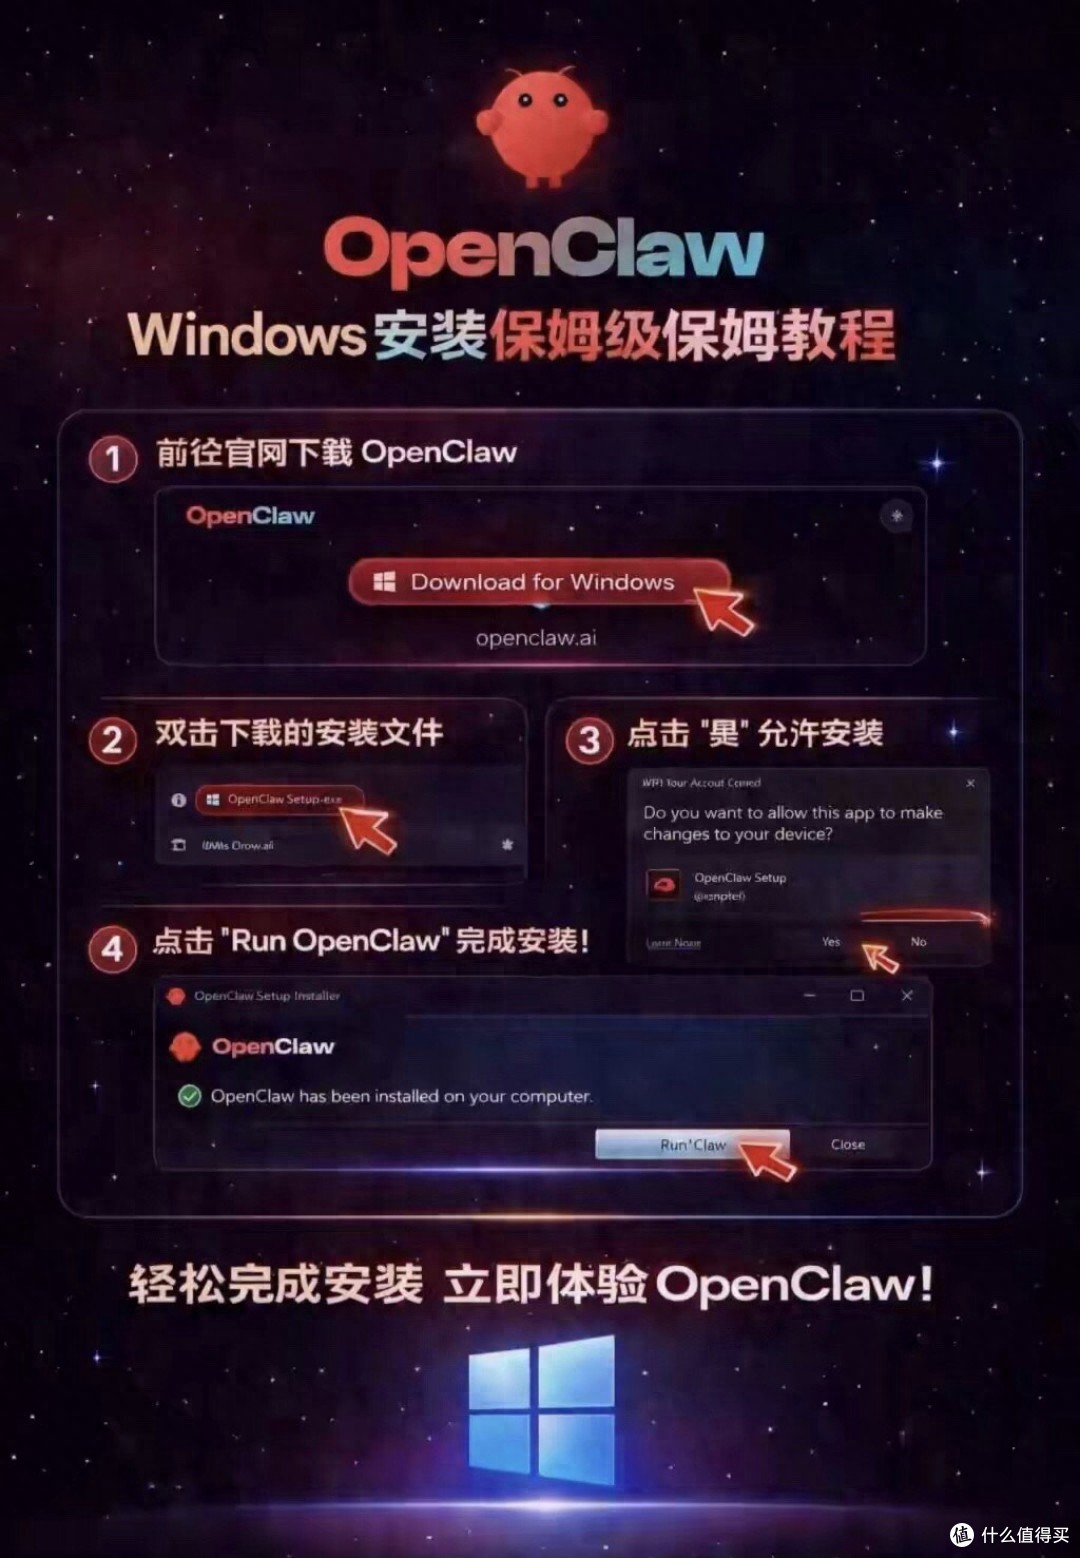
One-Click Installation on Computer (Most Recommended)
The official “one-click script” automatically configures your environment (including core tools like Node.js) without manual dependency installation.
1. Installation Steps for Windows
-
Open an administrator terminal:
- Click the search box in the lower-left corner, type “PowerShell”.
- Right-click “Windows PowerShell” and select “Run as administrator”.
- Click “Yes” when prompted. (Note: This step is crucial; insufficient permissions will cause errors)
-
Copy and execute the command:
- Paste the following command into the blue window and press Enter:
iwr -useb https://openclaw.ai/install.ps1 | iex- If the download speed is slow, use the domestic acceleration command:
iwr -useb https://open-claw.org.cn/install-cn.ps1 | iex -
Wait for completion:
- The entire process takes about 3-8 minutes; seeing “OpenClaw installed successfully” indicates success.
- Note: Do not close the window or disconnect from the internet during this process.
2. Installation Steps for macOS / Linux
-
Open the terminal:
- Mac: Click Launchpad → Other → Terminal.
- Linux: Press “Ctrl+Alt+T”.
-
Copy and execute the command:
- Paste the following command and press Enter:
curl -fsSL https://openclaw.ai/install.sh | bash- Mac may require entering the startup password (characters will not be displayed while typing; press Enter after inputting).
-
Wait for completion:
- Be patient as the script automatically downloads and configures the environment.
Mobile Installation Options (Android Only, iOS Use Cloud)
There are three main ways to install on mobile, choose as needed:
Option A: Official APK Direct Install (Easiest)
- Applicable: Android users who want to use locally.
- Steps:
- Access the OpenClaw official community Android page via your mobile browser and download the latest APK (about 68MB).
- Allow “unknown source applications” permissions during installation.
- Open the app, only enable basic permissions like storage and network, and deny unrelated permissions like contacts.
- Complete initialization as guided.
Option B: Termux Deployment (For Enthusiasts)
-
Applicable: Android geeks wanting full functionality.
-
Steps:
- Download and install “Termux” from the F-Droid store.
- Open Termux and enter the following commands (press Enter after each line):
pkg update && pkg upgrade -ypkg install nodejs git python -ygit clone https://github.com/OpenClaw/OpenClaw.gitcd OpenClawnpm installnpm start- After successful execution, enter the displayed address (e.g., http://127.0.0.1:18789) in your mobile browser to use.
Option C: Cloud/Cloud Phone (Recommended for iOS and Low-End Phones)
- Applicable: iPhone users, those with insufficient memory, or those who do not want to occupy local space.
- Steps:
- Search for “OpenClaw official cloud” or use cloud phone applications like “Red Hand”.
- Register and log in, then open OpenClaw directly in the cloud environment.
- Advantages: does not consume battery or memory, online 24/7.
Initialization and Startup (Essential After Installation)
Completing the installation does not mean you can use it directly; two steps are needed to start the service.
1. Initialize Configuration:
-
Open a new terminal window (PowerShell or terminal) and enter:
openclaw onboard -
Follow the prompts to set the admin password, choose AI services (new users can select cloud API), configure the port (default 18789), and press Enter for defaults throughout.
2. Start the Service:
-
Enter the command to start the gateway:
openclaw gateway --port 18789 -
Do not close this window, or the service will stop.
3. Open the Console:
-
Open a new terminal window and enter:
openclaw dashboard -
The browser will automatically redirect to the operation interface. If it does not redirect, manually enter: http://localhost:18789 in the browser’s address bar.
Common Pitfall Guide (Check Here First If You Encounter Issues)
Problem 1: Windows Shows “Execution Policy Forbidden”
-
Solution: In the administrator PowerShell, enter the following command, confirm by pressing Enter, then install:
Set-ExecutionPolicy RemoteSigned -Scope CurrentUser -
When prompted, enter “Y” and press Enter.
Problem 2: Slow Download Speed, Dependency Installation Failure
-
Solution: Switch to a domestic mirror source. In the terminal, enter:
npm config set registry https://registry.npmmirror.com -
Then re-execute the installation script.
Problem 3: Browser Cannot Open Console
-
Solution: Check if the port is occupied. Modify the port during startup, for example:
openclaw gateway --port 18790 -
Then access http://localhost:18790.
Problem 4: Phone Installation Lag
- Solution: For older phones (memory ≤ 3GB), it is recommended to enable “light mode” in settings and disable complex automation features.
Advanced Suggestions: Security and Skill Expansion
1. API Key Security:
- If using APIs like Alibaba Cloud, generate a Key in the console and do not disclose it directly to others.
- It is recommended to fill in the Key in the .env configuration file instead of hardcoding it in scripts.
2. Skill Installation:
- Newly installed OpenClaw functions like a chatbot; it can only work after installing Skills.
- It is recommended to first install the security scanning skill:
npx clawhub@latest install skill-vetter. - Then install skills as needed for search, office automation, etc.
3. Uninstallation Method:
- If you want to uninstall, enter in the terminal:
npm uninstall -g openclawto completely clean it up.
Conclusion
The core of installing OpenClaw is: administrator permissions + one-click script + initialization.
- For computer users: Directly use PowerShell or terminal to run the official script, completing it in 5 minutes.
- For Android users: Prefer the official APK; use Termux for older phones.
- For iOS/low-end users: Directly use the cloud version for ease and efficiency.
Technology is meant to serve life; may this “Little Lobster” become your capable assistant. If you encounter errors during installation, remember to check your network and permissions; most issues can be easily resolved. Good luck with your deployment!
Comments
Discussion is powered by Giscus (GitHub Discussions). Add
repo,repoID,category, andcategoryIDunder[params.comments.giscus]inhugo.tomlusing the values from the Giscus setup tool.